 Over the years I have accumulated a small pharmacy in my house and have become very good at organizing and packing medical bags and writing lists with emergency numbers and contacts. I am no doctor but after 11 years of doctor appointments, many hours of reading, lots of test and trials and home remedies, I feel I have a pretty good understanding of what I call "the dreaded three".
I refer to the "dreaded three" as allergies, asthma, and eczema. Chances are that if you have one of these things, you'll have the others. Allergies, asthma, and eczema are all interlinked and connected. Talk to any asthma specialist or dermatologist and they will tell you the same thing. For my oldest child, she got the short end of the stick and has the "dreaded three".
Since she was a baby we struggled to keep her skin "baby soft" and she has been hospitalized numerous times for asthma related problems. I have learned a lot over the years. I know I do not have all the answers. I know I still have lots to learn, and I still need guidance at times; but I do know a fair amount when it comes to dry itchy skin.
Like I said, I'm no expert but over the years I have gained lots of knowledge from the countless appointments we have sat through, tried more lotions and creams than anyone I know, and have tested and tried just about every home remedy there is to get relief. I felt that this information may be worthy of sharing with others since I know we're not alone when it comes to itchy skin. We have made trips to Mayo Clinic in Minnesota, Allergy specialists in Wisconsin, dermatologists in Mason City and Iowa City, and have met with countless other doctors and specialists trying to tackle my daughter's asthma, allergies, and eczema.
One thing that I have learned when it comes to asthma and eczema, is that you have to get any flare up under control before you start the treatment of maintaining it. Sometimes those flare ups, either skin related or asthma, come on quickly and hard to treat.
In regards to eczema flare ups, when the skin becomes extremely red, itchy, dry, sore and even painful, you have to combat the flare up allowing it to heal before you can worry about the different types of lotion you're using. I could write a whole other blog about asthma, but choosing to focus on eczema for now. So, here's what I do know...
Step 1: Getting an eczema flare up under control:
 In order to combat the flare up, you're most likely going to need a prescription steroid cream. In order to get the inflammation, redness, and itchiness under control, using a steroid cream for a short period of time can do wonders for your skin. Below are the ones we have used and had good luck with. Again, these are prescription creams, not something you can get over the counter.
- Triamcinolon .1%
>This works well on the entire body for those rough, dry, red, scaly patches. This should not be used on the face. We apply it 2-3 times a day until inflamed areas are cleared up. This is probably my favorite. Works well and fast on the toughest areas. This is a heavy thick white cream. Goes on like a typical body cream and absorbs well.
- Desonide Cream .05%
>This works well on the face, eyelids or genitals. One of my favorites for those more sensitive areas. This cream does have a greasy feel to it.
- Eucrisa Ointment 2%
>This is a brand-spankin' new ointment that is steroid free and suppose to have the same healing properties of steroid creams. Works well, but my daughter did mention that this ointment stung a little when applied. This applies like vaseline; greasy but easy to apply.

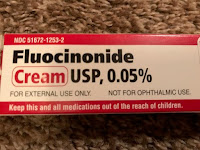 - Fluocinonide Cream .05%
 >This cream works on tough spots during flare ups. Hands, legs, arms... you name it, it works. This cream does have a greasy feel to it.
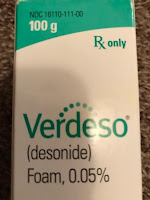
-Verdeso Foam .05%
>This medication comes out of a can exactly like hair moose does. It is light and fluffy and applies easily in a lightweight foam which is perfect for when skin is extremely inflamed and it hurts to rub in creams. You can quickly and easily apply it to large areas with ease. I call this stuff "liquid gold" because it's not cheap... but it does work.
>This medication comes out of a can exactly like hair moose does. It is light and fluffy and applies easily in a lightweight foam which is perfect for when skin is extremely inflamed and it hurts to rub in creams. You can quickly and easily apply it to large areas with ease. I call this stuff "liquid gold" because it's not cheap... but it does work.
Step 2: Soothing your skin during (and after) a flare up:
It's important to understand that your skin is your body's largest organ and a natural barrier to protect against infection and other unwanted things. If your skin is not healthy, elastic, an hydrated like it should be, it can make getting infections much easier. Dry cracked skin allows bacteria and other unwanted things to get in much easier. Plus, dry skin wrinkles faster/ easier... and nobody wants that! Below are some things you can try to help soothe your skin during and after an eczema flare up.
-Benadryl
>Often, nighttime is the hardest time. Itching seems to intensify and it makes getting a good nights sleep hard. A small amount of Benadryl can help shut off the recepters in your brain that are telling you to itch.
-Cold compress
>Using an ice pack on an area that is really itchy and sore can bring relief. It helps cool the area and "numbs" the itchiness. You can also use a cold wash cloth. Be aware that by putting a cold wet cloth on skin it will actually draw the moisture away from your skin. If you use a wet cloth and not an ice pack, protect the skin by slathering it up with a layer of Vaseline or heavy cream before apply the cold compress.
- Allergy Tablet (Montelukast Sodium 5 mg)
>An allergy tablet like the prescribed one we use or a Zyrtec will help control allergies and triggers to things that may cause flare ups.
>An allergy tablet like the prescribed one we use or a Zyrtec will help control allergies and triggers to things that may cause flare ups.
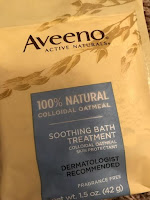
 - Aveeno Soothing Oatmeal Bath Treatments
 >These are great at soothing sore skin and can be comforting to soak in when skin in super itchy or sore.
-Coconut oil
>Coconut oil is a good oil to apply all over the body, especially after bathing. We have applied a layer of coconut oil, allowed it to "soak in", and then slathered on a layer of heavy cream. Coconut is not a nut, so it is safe to use if you have tree nut/peanut allergies (I know this first hand, as my daughter has a tree nut/ peanut allergy).
>A good topical cream that can help relieve itchy skin. Your doctor may be able to prescribe a stronger hydrocortisone cream if needed.
- Avoid long, hot shower/ baths
>The skin is like butter and using hot water will "melt" or remove that natural layer of oil that helps protect the skin. Warm showers and baths are okay, just pay attention to how long you're in there!
- Avoid scented bath washes and soaps
>Use a gentle body bar soap and only use in the necessary places. Using scented washed or large amounts of soap will dry out your skin. Dab your skin dry and apply heavy creams immediately after bathing.
>Use a gentle body bar soap and only use in the necessary places. Using scented washed or large amounts of soap will dry out your skin. Dab your skin dry and apply heavy creams immediately after bathing.
 - Pay attention to your detergents, clothing, and bedding
>Use scent and dye free laundry soaps. The scents and dyes in laundry soaps and irritate the skin. If you have eczema on your bottom or privates, wear cotton undies to allow your skin to breath. Cotton bedsheets just like cotton underwear prevent heat from being trapped. Heat makes eczema flare up.
Step 3: Maintaining skin quality:
 - FIND A GOOD CREAM
>Once the skin in under control - the redness, itchiness and burn- you need to maintain the integrity of the skin by keeping it well hydrated. Heavy creams will be your absolute best option. Lotions are okay and are easier to apply, but will not be as beneficial as a cream. Below are some of our favorites, ones we use on a regular basis, and ones that have been recommended to us by specialists and dermatologists we have seen over the years.
Once the flare up is under control and skin is no longer extremely cracked, red, itching or burning, you need to maintain the health of your skin. Below are some things that may help you do just that!
- Drink lots of water!
- Consider a fish oil supplement
>I can literally see a difference in my daughter's skin when she is on a fish oil supplement. Not only does it have skin benefits, but many other health benefits as well! Invest in a good quality supplement, not a gummy vitamin.
>I can literally see a difference in my daughter's skin when she is on a fish oil supplement. Not only does it have skin benefits, but many other health benefits as well! Invest in a good quality supplement, not a gummy vitamin.
- Pay attention to your diet
>Avoiding dairy and large amounts of gluten and carbs did wonders for my daughter's skin. Dairy is an inflammatory and gluten can cause "chicken skin" for those who may have an intolerance or sensitivity. This may be different for everyone, but doing a food elimination diet can help pinpoint the "triggers" to the flareups.
>Avoiding dairy and large amounts of gluten and carbs did wonders for my daughter's skin. Dairy is an inflammatory and gluten can cause "chicken skin" for those who may have an intolerance or sensitivity. This may be different for everyone, but doing a food elimination diet can help pinpoint the "triggers" to the flareups.
 - FIND A GOOD CREAM
>Once the skin in under control - the redness, itchiness and burn- you need to maintain the integrity of the skin by keeping it well hydrated. Heavy creams will be your absolute best option. Lotions are okay and are easier to apply, but will not be as beneficial as a cream. Below are some of our favorites, ones we use on a regular basis, and ones that have been recommended to us by specialists and dermatologists we have seen over the years.
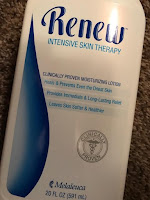
 - Renew by Melaleuca- one of my family's favorites. It is a lotion and goes on really nicely, but it's thick and seems to last for a long time like a cream. Even my husband who doesn't have eczema likes it because he can put it on in the morning and it lasts all day. It has the qualities of a cream but applies like a nice thick lotion. It is unscented and great at keeping skin soft and smooth. You can add a couple drops of lavender oil to it if you want a safe and pleasant scent.
-CeraVe cream: another great cream that is scent free and lasts for hours. Recommended by dermatologists. This cream is thick and lasts.
- Vanicream: a great cream that is lightweight and easy to apply (I like that part!) Also scent free and long lasting.
 - Eucerin: comes in either a lotion or cream. The cream is going to be much thicker and last longer, keeping the skin feeling smooth and itch-free. Lotions again are okay, but not the best choice when combating difficult skin. This cream is scent free, thick, and long lasting.
  - Hydrocerin: this is a thick cream that works well but does leave a bit of a greasy feel. Works well on trouble areas and lasts a long time.
 The key is to try a couple creams and use what works best for you. What works for us may not work for you. Whatever you choose, look for the thick, unscented creams and be aware that you are going to pay a pretty penny for all of them.
 *Other creams, pastes and oils that may work for you:
 -Udder Balm: This is a pleasant smelling balm that is well for sore, dry, cracked hands. Also works on legs, arms, cheeks, and feet!
- Emu Oil: oftentimes used by patients going through chemo, this oil was recommended to us by a family doctor. It is great at replenishing the natural oils your skin needs and can be applied on the entire body. (I purchased this on Amazon).

 - Calmoseptine ointment and Boudreaux's Butt Paste: Both a very heavy pastes that are good for severely dry, cracked or chapped skin. It creates a protective barrier for trouble areas such as bottom and privates. This will not heal the eczema, but will help protect the skin. Can be used on the genitals, buttocks, neck, etc.
 I hope you can find some relief and answers. I don't claim to have all the answers or know the most... but I do know what we have tried many, many things and know what works for us. Again, everyone is going to be different. I also know that when you're a mom and your kid is struggling with their skin, hurting and uncomfortable, you don't sleep well. You worry. You pray. And you wish there was something more you can do. You will try anything and everything if it means giving them relief and comfort from the dryness, itchiness, and pain that eczema brings. If you have other remedies or things that you have found work well, I'd love to hear them! I'm always open to trying new things and finding relief one way or another.


